Showing posts with label mini quilt. Show all posts

Friday, 9 September 2016

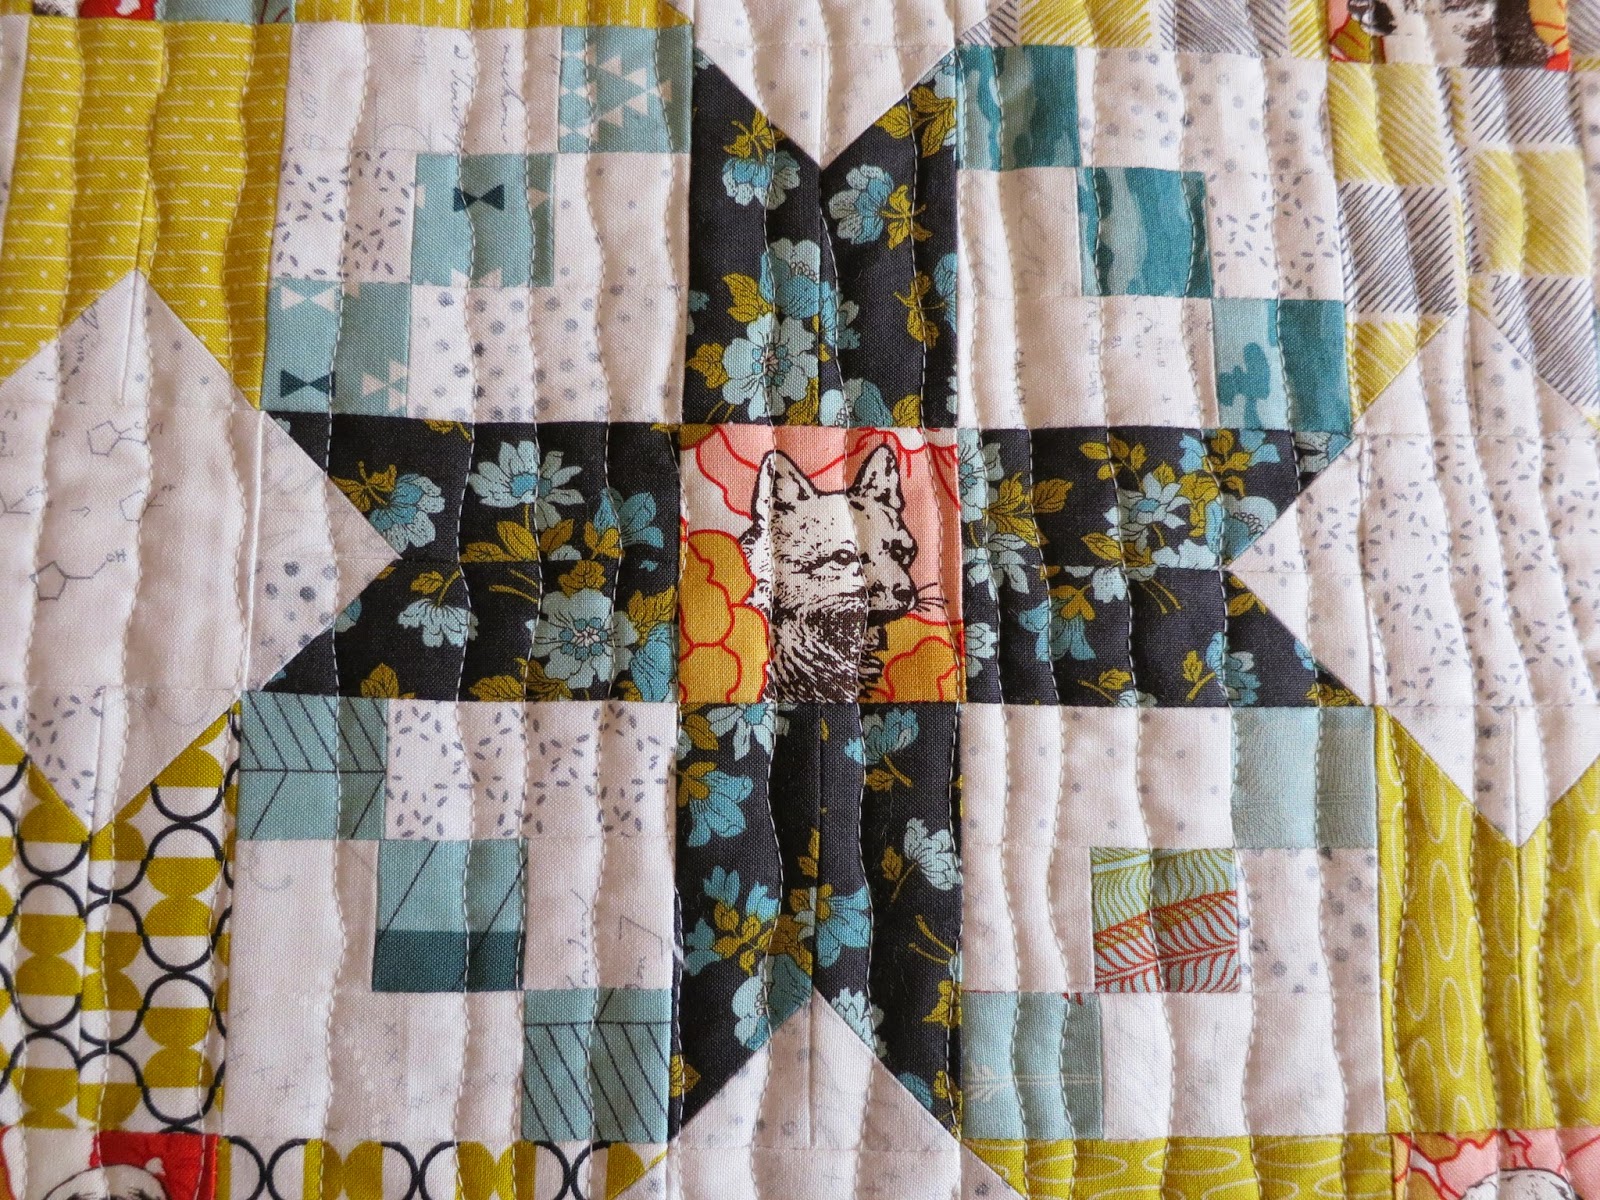
'There's a Bear in There' - Marti Michell Mini Quilt Blog Hop

Welcome to this long-neglected corner of the internet.  Since we last spoke, Vee and I have pulled the pin on cat&vee (while continuing to be great friends), and are following our own (as yet blog-less) paths as HelloFromCat and HelloFromVee - you can keep up as much or as little as you like via Instagram, we'd love to see you over there.

Now - on with today's tutorial for my 'There's a Bear in There' mini, made with Marti Michell templates.


I had clearly been living under a quilting rock, as I had not come across the magical Marti Michell templates prior to joining Angie on the Farmer's Wife 1930's Sampler Quilt Sew-along.  I was a very quick convert and have very much enjoyed the opportunity to discover new ways of using them through this Marti Michell Mini Quilt Blog Hop - please click through to read all about the hop on Angie's blog. All the bloggers' links appear there, and also at the end of this post.  And here is the link to Marti's shop - the home of the templates and also her fabulous book 'More Bang for the Buck' - it's a total must-have if you love Marti's templates and would like to learn how to use them in your regular quilting life.

When it came time to create my mini, I'd been having a minor obsession with square-in-square blocks.  It was also around the time that Play School's 50th Birthday celebrations had been on TV (along with a bunch of awesome short celebratory videos on You Tube!) - so I came up with 'There's a Bear in There'. If you're not familiar with the Play School song, here is their home page.

'There's a Bear in There' mini quilt details

Finished size 22" square
Templates used - Marti Michell A + B sets.
Fabric (specific requirements are detailed below):
 - four fussy cuts and various coordinating scraps for your square-in-square blocks.
- various scraps for your square-in-square borders - no bigger than 2.5" x 10.5" will be needed for any one piece.
- strips for your sashing.
- 24" batting.
- 24" backing fabric.
- 2.25" x WOF for binding - cut and join three WOF strips. You won't need the full amount, so will have a small amount left over for another binding project.

Please note - I am assuming you know how to quilt and bind a mini, and so have not given instructions for that, other than fabric requirements.  This mini lends itself to either machine or hand quilting, so please go ahead and quilt to your heart's desire.  I chose a low volume binding, so the mini would 'run off the edge' rather than be framed by it - again, please choose whatever coordinating or contrasting binding leaps out at you from your fabric stash.

Marti Michell templates + cutting instructions
Each of the four blocks uses different Marti Michell templates from the A and B sets.  Below is a full photo of the finished mini, plus a full diagram of the mini, followed by the template and cutting instructions needed for each block, working clockwise around from the top left Butterfly block.  Please refer to the photo and diagram below for template and strip placement.  In the cutting instructions, I've included my own fabric choices in italics, to (hopefully!) make it easier for you to see to which template + strip I'm referring.


Butterfly block:
- Marti Michell templates: one B10 centre square (butterfly) + four B13 triangles (teal/navy stars) + four B11 triangles (orange spools).
- cut strips: two 1.75" x 6" strips + two 1.75" x 8.5" strips (Cotton + Steel lady face dots) + one 2.5" x 8.5" (multi-coloured flowers) + one 2.5" x 10.5" (grey floral lace).


Telephone block:
- Marti Michell templates: one A1 centre square (telephone) + four A4 triangles (teal beads) + four A2 templates (orange with white spots).
- cut strips: two 1.5" x 6.5" + two 1.5" x 8.5" (cats) + one 2.5" x 8.5" (grey background with white flowers) + one 2.5" x 10.5" (blue houses on white background).

Bear block:
- Marti Michell templates: one A3 centre square (bear) + four A6 triangles (poo dot) + four A4 triangles (orange/brown butterflies).
- cut strips: two 2.5" x 4.75" + two 2.5" x 8.5" (pugs) + one 2.5" x 8.5" (orange circles) + one 2.5" x 10.5" (black/white/red text print).


Typewriter block:
- Marti Michell templates: one B8 centre square  (typewriter) + four B11 triangles (blue spools) + four B9 triangles (orange flowers).
- cut strips: one 2.5" x 8.5" (rain drops) + one 2.5" x 10.5" (black dot on white background).


Sashing:
- Marti Michell templates: one B12 cornerstone square.
- cut strips: four 2.5" x 10.5".  I used a Laurie Wisbrun for Robert Kaufman chair print (because "There's a bear in there, and a chair as well ...").  As the print is directional, I made sure to cut two strips with the 10.5" length horizontal, and two with it vertical.  If you are not cutting a directional print, you won't need to worry about that.


To construct your mini:
1. Make each block separately by sewing the inner round of triangles to the centre square, followed by the outer round of triangles.  Press your seams in your preferred way as you go - I normally press open, but chose to press towards the triangles in each instance here.


2. Refer to the mini-diagram above to add your border strips around each square-in-square block.  My fabric notes in italics above may also assist you with your chosen fabric placement.


3. Work out your preferred placement for your four blocks.  Use a 2.5" x 10.5" sashing strip to join the top left and top right blocks, and another to join the bottom left and bottom right blocks - taking care if you are using directional prints. Press seams towards the sashing.

4. Join the remaining sashing strips to the Marti Michell B12 cornerstone square. Press seams towards the sashing strips.


5. Sew the horizontal sashing strip to your top row, taking care to match the vertical sashing seams with the cornerstone square seams.  Add the bottom row.  Press seams towards the sashing strip.

6. Give your mini top a good press, and you are done!

7. Layer your mini top, batting and backing together and quilt as desired.  I chose to hand-quilt, as I needed a good on-the-go project for all the times I sit in the car / at activities waiting for my kids!


8. Add your binding - and your 'Through the Window' Marti Michell mini is done!

I hope you love making the mini as much as I did - it's a great way to showcase some favourite fussy cuts and prints.  If you would like more Marti Michell template inspiration, please click through to the other bloggers on the hop.

12 August 2016 Angie @ GnomeAngel.com

19 August 2016 Tonya  @ The Crafty Mummy

26 August 2016 Lucy @ Charm About You

2 September 2016 Kirsty @ Bonjour Quilts

9 September 2016 Cat @ cat&vee (you are here now!)

16 September 2016 Nathalie @ Les Ouvrages de Nat

23 September 2016 Alyce @ Blossom Heart Quilts

30 September 2016 Peta @ She Quilts A Lot

7 October 2016 Lisa @ Sweet Little Pretties

14 October 2016 Rachel @ Wooden Spoon Quilts

21 October 2016 Raylee @ Sunflower Quilting

28 October 2016 Lisa @ In the Boon Docks

4 November 2016 Marti Michell! 

But wait, there's more! 
If you make and enter a mini quilt - following any of the tutorials above - you will be in the running to win a Marti Michell prize pack!  To enter, make a mini (you must follow one of the tutorials) and submit a photo:
- to the link-up tool that each of the participating bloggers will post on their blogs on Friday, 18 November 2016;
- to the specific album in the Farmer's Wife 1930s Sampler Quilt Facebook Group; or
- on your Instagram with the hashtag #MartiMichellMiniQuiltmania and tag both Angie @gnomeangel and Marti @martimichell on your photo

Thanks very much to Angie and to Marti for inviting me to hop along with you all - it's been fun.  Here's to Marti's templates making themselves at home in your sewing room. xoxo cat

SaveSave

Sunday, 9 August 2015

.: time doesn't just fly, it zooms :.

So time flies, doesn't it?  Really super fast and without stopping.  It's over a month since we've been in this space, and there's so much to catch you up on, but for today, here's some sweet kittens from Elizabeth Hartman's 'The Kittens' pattern.


They're really cute, aren't they? - I love this pattern.  In fact, I love all Elizabeth's patterns - they are really fun and incredibly clear and well written.


I'm going to try Elizabeth's rabbit pattern next - though before that, I need to sew up a giraffe to go with the orange kitty - all will be revealed on that little project in the next week or so.  The red kitten will become a little doll-mini for my youngest.


And seriously, how cute are the tiny pandas! - they're by Alexia Abegg, from her latest range with Cotton + Steel, called Paper Bandanas.


OK back to time going fast and all that.  Hope you've had a great weekend.  xoxo cat

Tuesday, 30 June 2015

.: #cottonandsteelminiquiltswap :.

My Cotton+Steel mini has been finished, posted, and arrived safely with JoAnne in Arizona - so it's finally time to share some pics. 


The #cottonandsteelminiquiltswap was started and coordinated by Shannon from @modernstitchinmama on Instagram - and I signed up straight away despite my 'No Swaps in 2015' rule, because ... it's Cotton+Steel!  I was in team #tinselchen, led by Chen from @mushyhed.  Both Shannon and Chen did an awesome job in keeping everyone motivated and up to date. 


My partner JoAnne said she liked teal, greens, purple and beachy colours - so I made a little segue in trying to stick to those colours while making little scrappy 'beach huts', using Camille's Mini Dwell pattern.


It was fun choosing all the fabric combos for the huts, particularly the little fussy-cuts for all the doors.  My favourite is the little green rabbit.  And do please notice the 'Arizona' for JoAnne's home state!


I counted how many different fabrics I used, but of course have now forgotten.  It was very scrappy though, and I was so happy to use as many gorgeous Cotton+Steel fabrics as I could.  Here is the back (before I added the label).


And here is my final swap package - I added in some Furry Friends, one of our panels, and Peta's True North mini pattern.  Everything arrived safe and sound with JoAnne in a little over a week - awesome work by Australia Post and whoever they hand it over to in the US.


It's school holidays over here - at last, some breathing space, sleep-ins and no school lunches to make.  Hope your week has started well.  xoxo cat

Wednesday, 20 May 2015

.: Bloggers' Quilt Festival - True North Mini :.

Amy Ellis is very kindly spreading the virtual quilting love once again, by hosting the first of her two annual online quilt festivals.  It's just been Spring Quilt Market in Minneapolis, and so Amy's Creative Side Bloggers' Quilt Festival has been running all week, so that we can all celebrate quilting everywhere, not just in Minneapolis! - super lucky for me, since Brisbane and Minneapolis are thousands of kilometres apart, plus a very long time on a couple of planes.

I'm entering my True North mini into the Mini Quilts category.  The patten is by Peta from She Quilts a Lot - there's a full-size version in Peta's shop as well.  There are some gorgeous True North quilts on instagram, if you take a look through #truenorthquilt.


My mini has mix of gorgeous Moda fabrics from fat-quarter bundles.  I normally sew much more scrappily - so it was a different experience to sew from just three different fabric lines.  I think the world may stop turning if I ever sewed from just one!


The fussy-cut animals and all the blues are from Urban Chiks' Nomad.  The citron yellows are from Amy Ellis' Chic Neutrals, and the backgrounds are from Modern Background - Paper by Zen Chic.  I think they all play really well together, and I absolutely love how my mini has turned out.


The quilting is my very favourite organic lines - it's my all-time quilting favourite because by adding 'organic' to 'lines', there can be no mistakes ever!


Peta has written a great pattern, it sews together really quickly.  I love the nifty little faux nine-patches for the star corners.


The Nomad animals are so sweet - I think it's my favourite print in the range - though I also love the navy flowers and the pale blue feathers in the pic below.


For the back, I've used a favourite print from Moda - Erin Michael's Lush Uptown - have you seen Erin's new line Purebred, which was released at Quilt Market over the weekend? Love it already.


This little mini is headed to my little desk in the corner, to be a mat for my laptop.  It measures 18" x 18", so it's the perfect size.


Happy Spring Bloggers' Festival everyone.  There are some really gorgeous entries already, please go check them out over a cup of tea.  Have a great day.  xoxo cat

Wednesday, 29 April 2015

.: WIP Wednesday - Cotton + Steel Mini Quilt Swap progress :.

Wahoo! - I'm finally back onto sewing my Cotton + Steel Mini Swap - the pieces have been cut and ready to roll for a few weeks, but have taken a back seat while I continue on with bee blocks and blocks for my girls' quilts.

I don't want to say too much yet about the reasons I've chosen these particular colours and the Mini Dwell pattern for this swap - as it's all very secret squirrel until it's been received.  :-)


There are 27 different Cotton + Steel fabrics so far in this mini - in fact, it'll probably stay at around 27 total, since I'm planning to sash with a mix of the low volumes I've already used.  At this stage, I'm thinking the binding will be scrappy.


I do love all the mini houses, but I think my favourite is the purple house in the middle, with the green rabbit in the doorway.

Linking up - for the second week in a row! - with Lee's WIP Wednesday at Freshly Pieced.  Hope you've been getting plenty of making done so far this week too.  xoxo cat

Saturday, 24 January 2015

.: Teeny Weeny Swap :.

A few of the Brisbane MQG girls were lucky enough to score a spot in the Teeny Weeny Swap, which was originally just between Vancouver MQG and Greater Western Sydney MQG.

The main requirement for the swap was teeny weeny piecing - we could make tiny mini's, a spectacle case, needle book, or a collapsible thread-catcher.  My partner was Samantha and I was really happy  to sew with her preferences for a mini with plums, greens, teals, text prints, Amy Butler and AMH.  From memory (as this was before Christmas!) - Samantha also specifically mentioned that she liked Sew-Ichigo's strawberry - so my decision was very easy, as I love the strawberry too! 


The mini measures about 8 1/2 inches square, and is bound in an AMH print, with an Amy Butler butterfly on the back. 


I even made a little label, out of Terra Australis prints.


And this piece of gorgeous is what Samantha made for me!  Isn't it fabulous?!


I just LOVE it and couldn't believe it was mine, when the Teeny Weeny goodie box was opened up at our MQG end-of-year lunch in December.  It truly is a gorgeous mini, in my favourite colours + text prints, and is something I would have chosen to make for myself.  Just perfect.  Do you spy the teeny heart in the centre?  Thank you Samantha! 

And I thought I would share how I made the strawberry panel - since I never ever actually remember to take process-pics, but for some reason managed to take them this time.  The strawberry-body had to be made from teeny weeny pieces, and so I followed the Stamp Collection block tutorial on Elizabeth Hartman's Oh Fransson blog.

I made a templastic template for the 'body' of the strawberry - and you can see I've marked on the template, where the 'complete' squares would be, so I could double-check I wasn't cutting any particular fussy-cuts in half - because half-bodies and half-heads just drive me crazy!  Each square was cut *I think* 1 1/2 inches - maybe only 1 inch.  I laid them onto a piece of interfacing in a 6 x 5 grid, and slowly ironed them on. 


Once the interfacing was ironed on, I sewed each row together, and snipped the seams open (remembering this is all according to Elizabeth's tutorial - click on the link above).


And then the rows are sewed together running the other way, and seams snipped open.  Here's the completed panel from the back, with all seams snipped and ironed open. 


Here's the completed panel - I then laid the plastic template on top and carefully cut around it to create the strawberry-body, and carried on with the piecing. 


I made the leaves and stalk out of low volume fabrics, so the leaves could say "teeny strawberry", but then forgot to sew the background in greens + teals and just carried on with the low volume ... so the leaves don't pop out as much as I'd hoped.  The "teeny" comes from HappySewLucky Berene's "Improv Adjectives" Spoonflower prints - I was very happy to find "teeny" in this awesome fabric, as Berene (who was then in Vancouver MQG but is now in Toronto) was the original co-ordinator of the swap (along with Lorena from GWSMQG). 

I added in a little HST border to bring in the greens + teals that I had forgotten in the background. 


This was a really fun swap to be a part of, and some wonderful things were made.  We hadn't all realised that it was a direct swap - until we all opened up our little packages at our Christmas lunch - and that was such a happy discovery for everyone.  Thanks to Lorena and Berene for coordinating it, as well as Kelly from Brisbane MQG, and of course to Samantha for the gorgeous mini! 

xoxo cat

Wednesday, 10 December 2014

.: Handmade Christmas - #spellitwithfabric :.

In the second of my Handmade Christmas posts for the year, all I can say is - thank goodness for Moda's little 'Spell it with Fabric!' pattern book.  All the letters are very easy to follow, and quick to sew up.

First up is an 'E' cushion for my younger daughter's little Prep buddy at school.  I hope you are noticing, even if you have to squint, the fussy-cut red Ninja Turtles, since she told me that he (Mr Red Turtle) is her buddy's favourite.


Next are three enormous coasters/small table mats/mini quilts for teachers of my older daughter  - her French teacher, year adviser, and music/drama/homeroom teacher.  


Sewing up these three enormous/small/mini's coincided with the arrival of my Priory Square half-yard bundle from Pink Castle, so I have used it in each one.  I love all the prints I have used, and will most likely be looking to buy more.  


Here are the backs - two with Priory Square, and then the last with Kate Spain - though all three with Priory Square binding.  I do get a little immediately obsessed when fabric packages arrive in the mail.


And now last up, a set of coasters for the girls' violin teacher and his wife (since I figured it would be a little mean to just make one for him ...).  I half-sized the Moda letters for the coasters, and used Bonnie & Camille's new Daysail line for the letters, and my favourite print from their Bliss line for the binding - as well as the perfection Andover 'Love Notes' music print. 


And for the backs - come on, could I really go past violin fabric?! - since it exists?!


More sewing will be kicking off tonight, and will possibly be finished to share tomorrow but certainly by the weekend.  It's the last day of school tomorrow, which is just so completely fantastic, I can't even tell you.  Hope your week has been going well and you are gearing up for a great weekend.  xoxo cat

Tuesday, 1 July 2014

.: koala trio :.

I haven't yet shared all three of the koala minis I made!  If you've been here before, you'll have seen the minis I made for Camille and Holly already.  Reading Camille's awesome Australia Part 1 post last night has reminded me that I haven't shared all three of them together! 


If you follow me on instagram (I'm @hellofromcat), you will of course have seen all three of them already.  I started the middle koala up there, for gorgeous Pam, weeks and weeks ago, as a little thank you for such a lovely time when we met up in San Francisco way back in January!  I just never actually sewed him up into a finished mini though.  And then when I found out I'd be going along to Camille's trunk show and Red Letter Day class - and that her gorgeous friend Holly would be coming along too - I sewed up another two koalas! - and then set up a little koala-quilting-production-line to finish all three of them together. 

This one is Camille's - all in Bonnie+Camille fabrics, including the koala-grey - except for the Pam Kitty Morning white on white 'Recipe for Success', and the black/grey sketch.  And the tree-branches! - that's from the Lush Uptown line. 


And this one is Pam's - all the greens are Pam Kitty Morning, and the 'Recipe for Success' white.  The koala-grey is a gorgeous yarn-dye chambray from PolkaDotTea Fabrics.  His eyes and nose are the same black/grey sketch.  And the binding is a Lizzy House print. 


And this one is Holly's!  I should have mentioned by now, that the fabulous koala pattern is by the very-talented Kristy of Quiet Play.  I love all Kristy's patterns, they are very clever, well written and super-straight-forward to follow.  


And here are all the koalas together, before heading off to their new homes!  I loved making them for Pam, Camille and Holly, and I love that they are now living happily in different parts of America.  


Hope your week has been a good one so far.  It's a truly gorgeous day here in Brisbane today - not a cloud in the sky, and only about 20 degrees - just perfect.  xoxo cat
Related Posts Plugin for WordPress, Blogger...